
The morning after my knee replacement surgery, I learned something nobody had warned me about. I couldn't get out of bed. Not without help, not without pain, and not without the very real fear that I was going to end up on the floor. My husband had to stand beside me every single morning for the first three weeks, and I could see the worry on his face each time. That fear of falling out of bed is not irrational. Most falls in seniors happen in the bedroom or bathroom, and getting up from bed is one of the riskiest moments of the day when your knees aren't cooperating.
When my physical therapist, Sandra, finally visited the house for a home assessment, the first thing she watched me do was try to get up from the bed. She stopped me halfway through. 'You're doing it all wrong,' she said, which is not what you want to hear. But it was exactly what I needed. She showed me a specific technique, and she pointed at my bed and said I needed something to hold onto that wasn't my husband. That's when I got the Medline Bed Assist Bar. Together, the technique and the rail, they changed my mornings completely.
If getting up feels like a fall waiting to happen, this is the $33 fix Sandra recommended
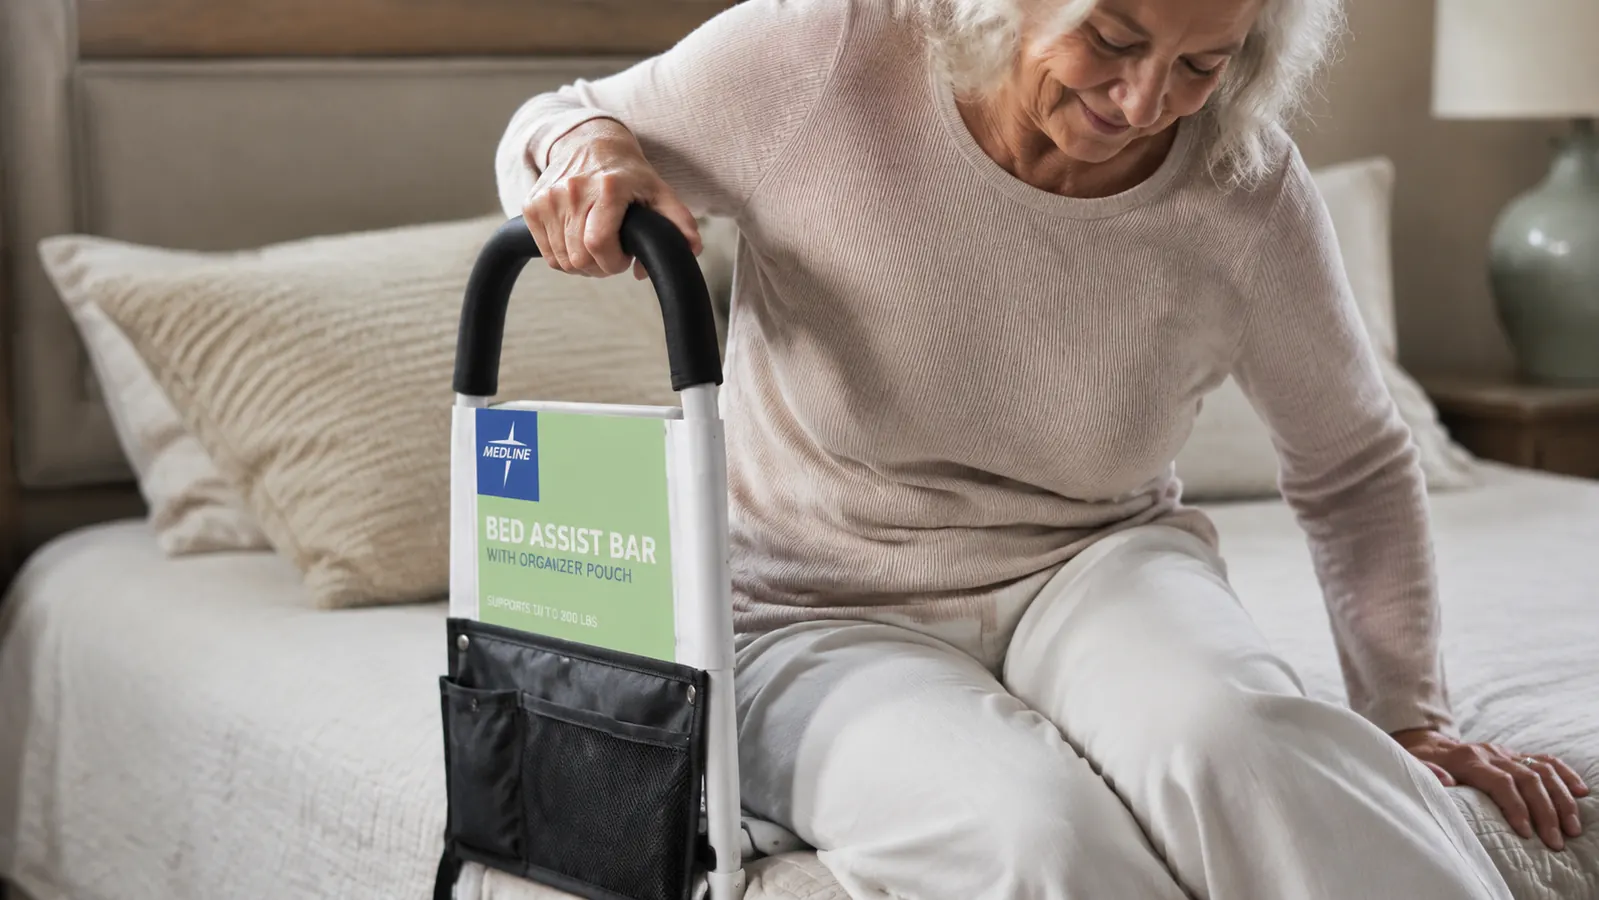
The Medline Bed Assist Bar fits most standard mattresses, adjusts to different heights, and has a padded handle your hand can actually grip first thing in the morning. Over 15,000 reviews and rated 4.6 stars. I use mine every single day.
Amazon Check Today's Price on Amazon →Before I walk you through Sandra's method, I want to say something plainly: if you or your parent has bad knees and is getting out of bed by just sitting up and swinging their legs over in one motion, that is a fall waiting to happen. The technique below is not complicated. It takes about 30 seconds and it works. I've been using it every morning for eight months and I have not fallen once during that time.
Step 1: Don't Sit Straight Up. Roll to Your Side First
This was the biggest correction Sandra made. Most of us were taught to sleep, wake up, and sit upright. For years that worked fine. But when your knees are arthritic, replaced, or just worn out, that straight-up motion twists the knee joints in a way they aren't ready for, especially first thing in the morning before they've had time to loosen up. Sandra called it 'cold knee syndrome,' meaning stiff joints that haven't had time to warm up, and it's worse in cooler weather.
The correct first move is to roll your entire body to one side, whichever side your bed assist bar is on, or whichever side is closer to the edge. Keep your knees together as you roll. Don't let one knee twist away from the other. Think of your body as a single log rolling over, not a series of joints bending independently. Sandra actually used the phrase 'log roll' and it stuck with me. The log roll keeps your spine aligned and takes almost all of the torque off your knee joints.
Once you're on your side, pause for a moment. Don't rush. Take a breath. You want your body to settle in that position before you move to the next step. If you have a pillow between your knees when you sleep, keep it there until you finish the roll, as it helps maintain knee alignment through the movement.
Step 2: Push Up With Your Arms, Not Your Knees
Here's where the bed assist bar earns every dollar. Once you're on your side, you need to push your upper body upright. If you try to do that with your core muscles alone, most people instinctively bend their knees and push off the mattress, which is exactly the high-pressure, twisting load that causes pain and increases fall risk. Instead, you want to push yourself up with your arms.
Place both hands on the mattress in front of you, or, if your bar is in position, reach for the handle with one hand and place the other on the mattress. Then push your upper body up in a slow, controlled arc until you're sitting on the side of the bed. Your legs should still be on the mattress at this point, bent at the hip, not yet hanging down. Sandra timed this motion for me and said it should take at least three seconds. If you're doing it in one second, you're going too fast.
The Medline Bed Assist Bar matters here because the handle is at the right height and angle. When I tried doing this while gripping the edge of the mattress, my hand kept slipping. The padded rail handle gives you something stable to push against, and because it's anchored under the mattress, it doesn't tip or slide. That stability makes a real difference when you're moving slowly and deliberately at 6 in the morning.
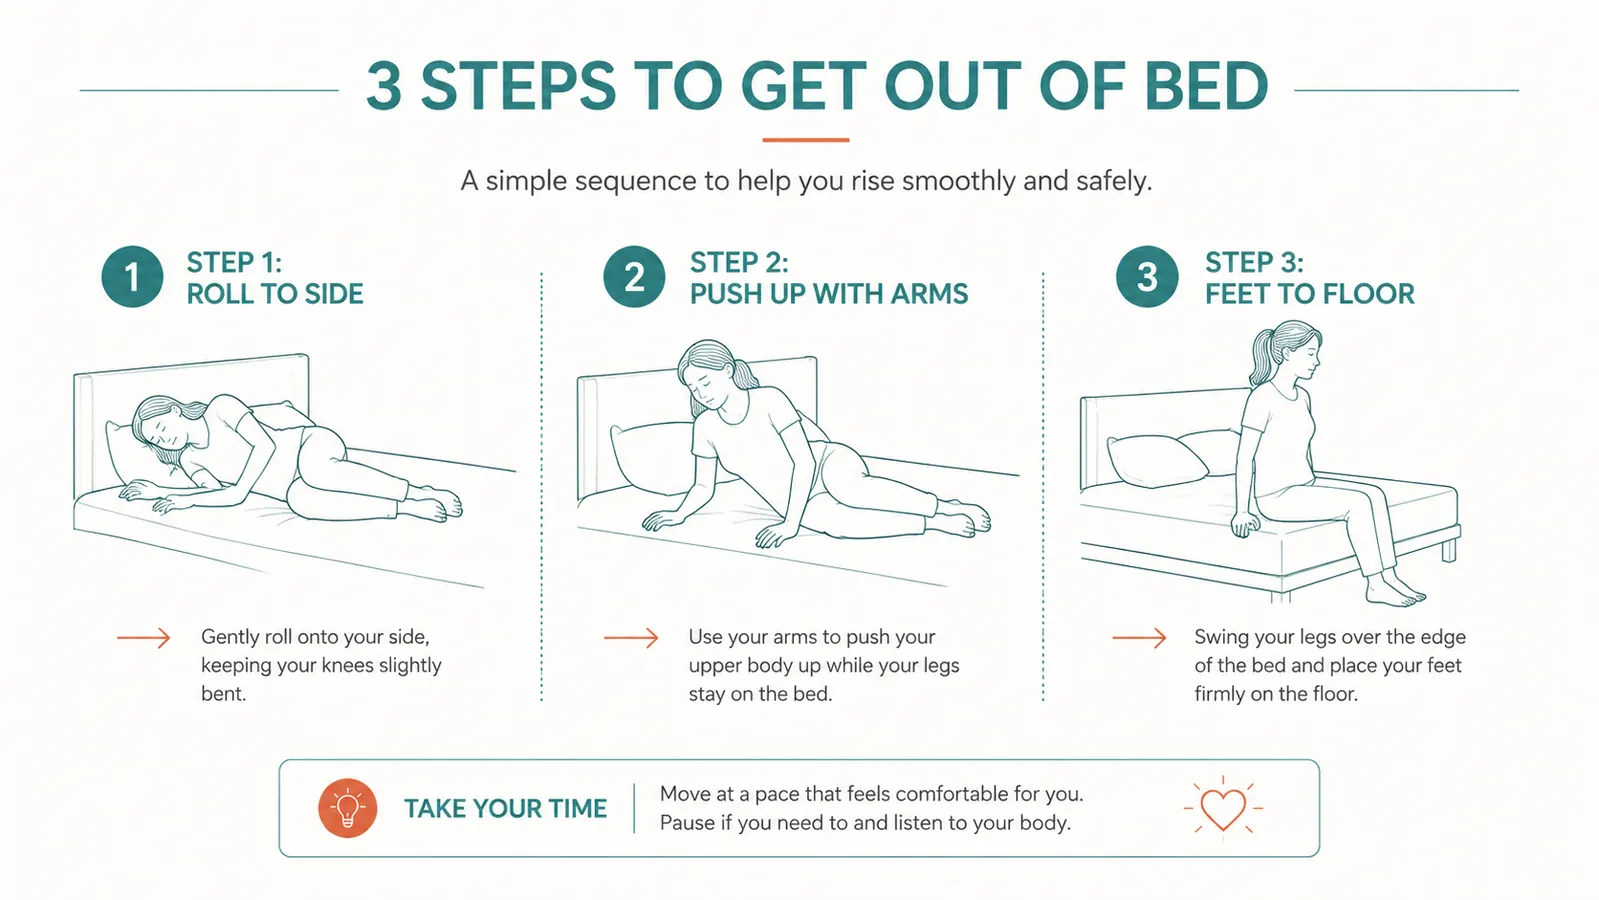
Step 3: Sit on the Edge and Wait. Don't Stand Immediately
This step surprised me because it's not really a movement. It's a pause. Once you're sitting upright on the edge of the bed, Sandra said to stop and sit there for at least 30 seconds before you stand. I thought this was optional advice. It isn't. She explained that when you go from lying flat to standing quickly, blood can pool in your legs and your blood pressure drops momentarily. That drop is called orthostatic hypotension, and it can make you dizzy or lightheaded, which is one of the most common reasons seniors fall right next to the bed.
During those 30 seconds, let your feet dangle down and touch the floor. Wiggle your toes. Take three slow breaths. I use this time to assess how my knees feel that morning. Some mornings they're stiff and I give myself a full minute. Other mornings they feel looser and I'm up in 30 seconds. What I never do anymore is stand up the moment my feet hit the floor.
Keep one hand on the bed assist bar the entire time you're sitting at the edge. Don't let go until you've stood fully upright and taken one steady step. The bar is there for exactly this transition moment, and it's the moment people most often skip it because they feel fine sitting. Don't skip it. The lightheadedness, if it's going to happen, happens in the first two seconds of standing.
Step 4: Stand Using Your Leg Muscles, Not a Lurch
When you're ready to stand, scoot to the very edge of the mattress so your weight is right at the front of the seat, not back in the middle of the bed. Sandra was very specific about this. If your weight is back, you have to lurch forward to stand, and that lurch is uncontrolled. If your weight is already at the edge, the movement to standing is a controlled press upward.
Place both feet flat on the floor, shoulder-width apart. Grip the bed rail handle firmly. Then lean your upper body slightly forward, 'nose over toes' as Sandra always said, and press through your heels to stand. Don't straighten your knees all at once. Let the movement be gradual, like you're being lifted by a slow pulley. Once you're upright, hold the rail for a full second before you take your first step.
Sandra said the lurch is what gets people hurt. If you're lurching to stand, something in your setup is wrong. Either your feet are too far back, your bed is too high, or you don't have anything solid to hold.
Step 5: Check Your Setup (The Technique Only Works If the Bed Height Is Right)
After Sandra taught me the technique, she pulled out a tape measure. The ideal bed height for a senior with bad knees is one where, when you're sitting on the edge, your feet are flat on the floor and your hips are at or slightly above a 90-degree angle. If the bed is too low, you're fighting gravity on the way up. If it's too high, your feet don't reach the floor properly and you lose stability before you even start standing.
The Medline bar is height adjustable, which matters because it pairs with whatever mattress height you have. I have a thick pillow-top mattress and it adjusted to the right height without any tools. If your mattress is on the low side and making the technique harder, Sandra mentioned that bed risers under the legs can bring it up a few inches. Sometimes that's the simplest fix. But sort the technique out first. The technique is the foundation.
One more thing about setup: the bar should be on the side of the bed you naturally roll toward. For most right-handed people that's the right side. Mine is on my right. I tried it on the left for a week and kept reaching for it in the wrong direction. Put it on the side your body already wants to use.
What Else Helps
The technique and the bar handle about 80% of the problem. The other 20% is everything else around it. Non-slip socks or slippers matter more than most people think. Getting your feet on the floor flat and firm is part of Step 3, and bare feet on hardwood or tile can slide. Sandra gave me a pair of hospital-style gripper socks and I've bought several since. They cost almost nothing and they work.
Lighting is the other thing. A nightlight near the bed, or a lamp with a switch you can reach without getting up, means you're not squinting into darkness when you wake at 3am to use the bathroom. That late-night trip is when most falls happen, according to Sandra. If you can't see where you're stepping, the best technique in the world still leaves you guessing. I use a small plug-in nightlight on the outlet nearest the bed. It cost $4 and I will never sleep without one now.
If you're buying this bar for a parent, check in about their nighttime routine. The bar helps most when they actually use it every single time, including at 3am when they're groggy and the reflex is to just push up and go. It takes about two weeks to make the technique automatic. In the first two weeks, a sticky note on the nightstand lamp that says 'log roll first' is not a bad idea. I'm not joking. Sandra recommended it and it worked.
For a deeper look at why a bed assist bar makes such a difference for nighttime safety, I wrote up a full breakdown at 10 reasons a bed rail prevents nighttime falls. And if you want to read my full experience with the Medline bar specifically, including what I like about it, what its limits are, and whether it fits different mattress types. That's all in my long-term review of the Medline bed assist bar.
The technique works better when you have something solid to hold. This is the one Sandra picked
The Medline Bed Assist Bar fits most standard mattresses (twin through king), adjusts to different heights without tools, and has a small storage pocket for a phone or glasses. Rated 4.6 stars from over 15,000 real buyers. Sandra said it's the most practical option at this price.
Amazon Check Today's Price on Amazon →